Today I am going to show you how to easily create a beautiful minimalist WordPress theme in Photoshop. Actually I was working on the re-design of this blog and got an idea to write a tutorial for minimalist WordPress theme.
I am using a noisy texture here a with some letterpress effect which is being used widely nowadays. Following color scheme is used in this tutorial.

One of my favorite way to choose a color scheme is Adobe Kuler. Many great color palletes are available there to choose from. If you want try this tutorial with different colors; go there and choose your favorite.
1. Setting up Working Area
Create a new document (File>New) with following specifications.

Now lets add margins to our document. Go to View>New Guide and two vertical Guides at 40px and 980px.

It would look like this.

2. Creating Background Texture
Create a new layer above background layer and name it as bg_texture. Change the foreground color to #bfbcb3 and press (Alt+Backspace).
Now go to Filter>Noise>Add Noise. Change the Distribution type to Uniform, Amount to 3% and select Monochromatic and apply the filter.

Your document would look like this.

3. Let’s Start with the Header
Create two new Horizontal Guide at 300px and 350px & Vertical Guides at 650px and 680px.

Now write your blog name at the center of header area. I choose
Font: Brush Script Std.
Font Size: 150px
Weight: Medium
Color: #f01685

Now Double Click on the ‘blog title’ layer and add the following style.

Your header will look somewhat like this.

Now add the social icons with color #9fa69c as shown below. Vector icons are included in the source file.

Add the following layer style to each of these icons.

Not it’s time to finish the header. Select the Single Row Marquee Tool from the List Marquee Tools. Create new layer and name it as header_sep and add the horizontal selection are as shown below.

Fill this area with #e7e3da, move the section area downward and fill it with #474143. Select the Eraser Tool (E) with 300px size and smoothly erase the separator at both ends to look like this.

4. Create a Sidebar
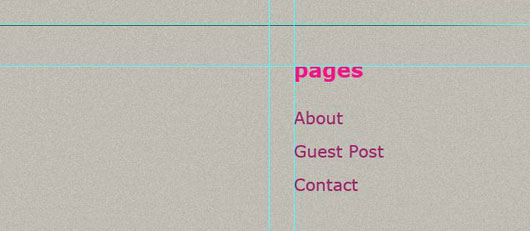
Write the title of sidebar ‘Pages’ and then pages ‘About, Guest Post, Contact’. Here I choose
For title
Font: Verdana
Font Size: 25px
Color: #f01685
Align: Left
For content
Font: Verdana
Font Size: 20px
Color: #9c266a
Align: Left

Now add following layer style to sidebar title ‘Pages’

Copy header_sep layer and paste below the sidebar title ‘Pages’

Now cut the separator on the left side to get following result.

5. Add Contents to the Design
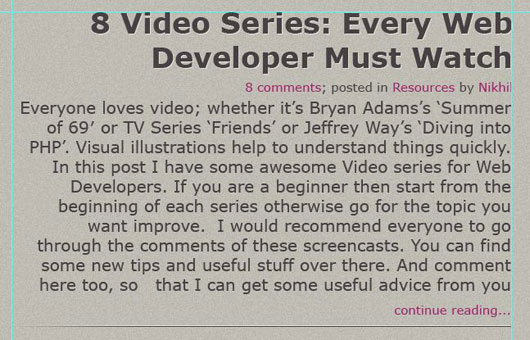
Add some content to the design as shown below.
Title of Post
Font: Verdana
Font Size: 35px
Color: #474143
Align: Right
Add the following layer style to Post title.

Add the header_sep line at the end of post and cut it on the right side as shown below.

Repeat this with another post too.
6. Finish with the Footer
Add some copyright stuff and basic links like About, Contact in the footer as shown below.
Font: Verdana
Font-Size: 15px
Color for Pages: #474143
Color for copyright: #bfbcb3

Now add following layer style to copyright text.

That’s it! You have created a Beautiful WordPress Theme in Photoshop. Here is the Final result.

You can also download the source file here.
 I would like to know your comments and suggestion on this tutorial.


29 Comments
great, it is simple but beautiful.. thx
I am glad that you liked it!
🙂
Its gr8 tutorial , buddy. Thanks.
Thanks bro…
😀
It's cool theme…….
Thanks buddy.
🙂
hey nikhil , thanks for the tuts buddy 😀 you described it very clearly, one doubt, in some of the web tuts the dimension change ,s o what is the real size , plz. ( silly doubt )
Hi Shri,
according to me 960 grid is the standard size.
I have used 1020 px here and added margins at 40px from both left and right sides to accommodate all the matter in 940px that is within 960px size.
I agree, looks …"sweet" , thanks for the tutorial.
Hi
Nice tut.
The source zip dl is corrupt (no contents)-Can you please fix that? Thanks
Hey Richard,
Thanks for appreciation. The link is working fine for me.
try once again with this link:
http://dl.dropbox.com/u/1871129/WPtheme-tut.zip
Hi Nihil
Thanks for sorting the zip dl for me!
I look forward to trying your tutorial (I have GIMP & PSP7)
& trying Letterpress style & converting it to WordPress theme-that’ll keep me busy!
Best wishes
Super tutorial man.! This one is featured @ FamousBloggers | Kudos for that 🙂
im sticking to ur blog now Nikhil.
clean n neat tut.
Also, can u post tut on cuffon font ? or how to use above font used in photoshop in actual wordpress theme?
thanks your great theme
cool 🙂 thanks for super clan tut. loved the simple step by step guide.
wish can u post PSD to HTML conversion tut on this.
This is a good tutorial. I will try to do this theme, i hope to succeed.
Nice tutorials, it’s simple but attractive, thanks for this source… 😀
I agree, looks …”sweet” , thanks for the tutorial.
Highly descriptive article, I enjoyed that bit. Will there
be a part 2?
Wonderful advice and extremely informative tutorials for WordPress and Photoshop.
I’ve usually gone with the standard wordpress theme, but this makes me want to experiment!
Brillliant! That’s exactly what i’m looking for!
good job